Tutorial: Export form Hydroman to Solid Works
Export to 3D Assembly in SolidWorks:
In HydroMan: Go to ‘File’ -> ‘Export 3D Model’
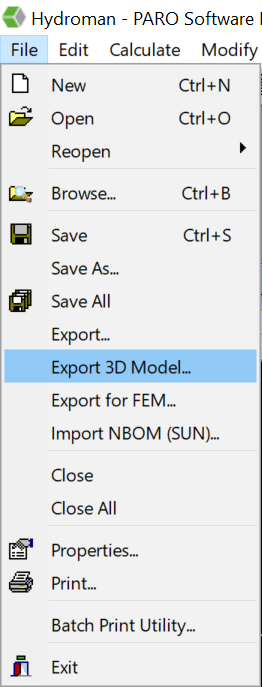
This window will pop up:
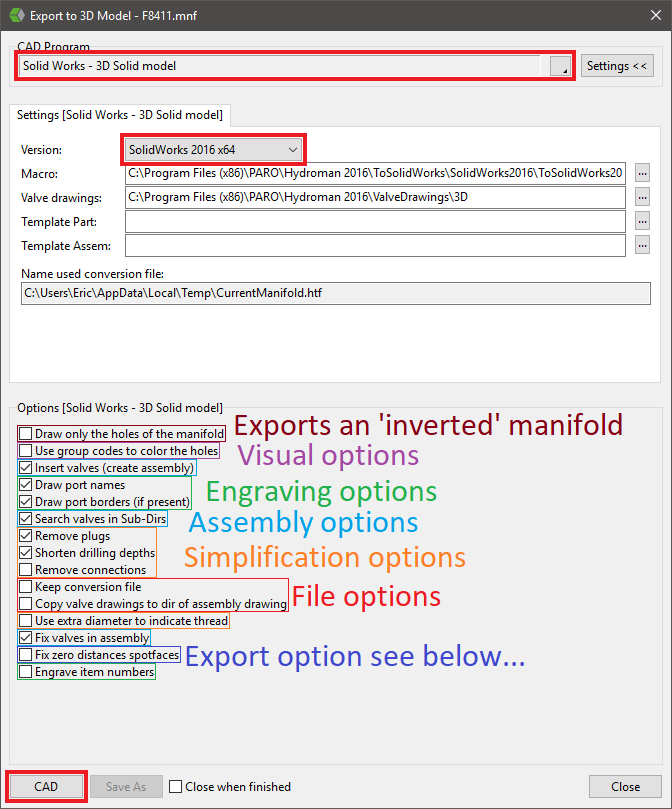
Select at CAD Program Solid Works – 3D Solid model. Select at Version the Solidworks version you use. At Marco the right path should be automatically selected The path can be different from the picture if you have another version of Hydroman installed. For example:
C:\Program Files (x86)\PARO\Hydroman 2018\ToSolidWorks\SolidWorks2016\ToSolidWorks2016.exe
At Valve drawings you select the path where the Solid Works models are saved.
You have a bunch of settings you can check. You can simplify the output (shorten drilling depths, remove plugs (doesn’t export construction holes))
There is an options that is interesting when the export fails at a certain hole: Fix zero distances spotfaces; when a distance between 2 spotfaces is exactly 0, SolidWorks can’t handle it, this gives it a minor 0,0001 difference so it still exports.
3D assembly models: HydroMan will automatically make the assembly in SolidWorks when the files are found in the specified folder (Valve Drawings). These files must be a SolidWorks part file. The names of these files are already specified in HydroSym! The insertion point of these files must be on the spotface (cartridge) or on the pressure port (build-on valve) and rotated in the right direction. Otherwise HydroMan does not know how to insert the valves.
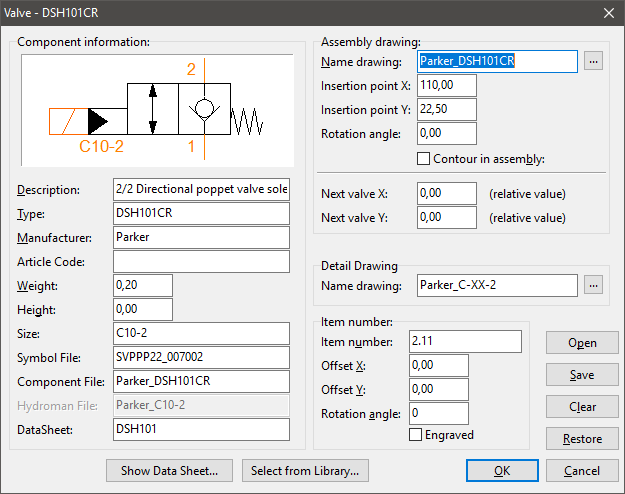
Change a valve drawing in HydroMan: To change the name of a 3D file that it’s going to look for in HydroMan you select a hole/valve and press [V]. This will bring up the ‘Valve List’ (if it’s a stack, there’s more than 1 valve). Select the valve you want to modify and press ‘Edit’. Here you can change the Assembly drawing name on the top right.